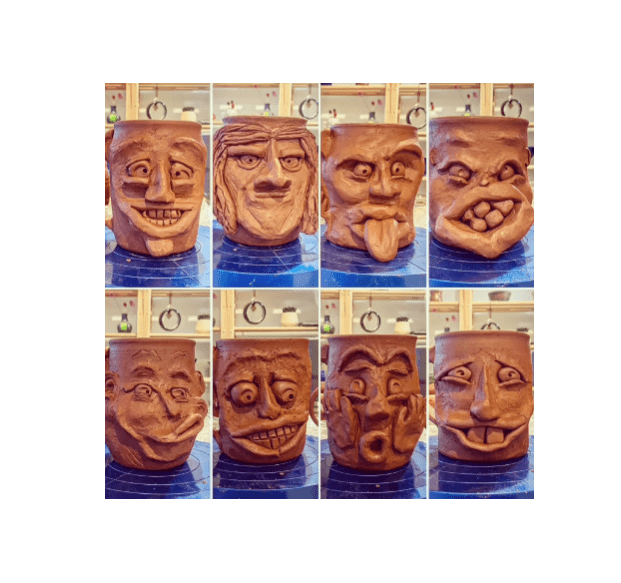
Pottery. The unique process of creating handmade vessels, forms and other objects with clay and other materials and when fired at high temperatures in a pottery kiln creates a hard, durable form for usage and display. You want a home studio but one problem, you live in an apartment. Forced to dwell in a small space while still having a burning passion to pursue your love of pottery. In this article, I attempt to show you the many challenges of what a personal art studio in an apartment is and how these challenges can be conquered.
 The challenge of space.
Most personal pottery spaces are going to depend on a several range of factors including the size of your pieces, the amount of activity, availability, and more. For my example, I will give you a full explanation of the 90 sq ft space that I have dedicated to my pottery adventure. With it being such a small space, this example should show any artist how much bang for the buck the least amount of space can provide so if your space is larger, more power to you! Because of the lack of raw square footage, the obvious decision was made for my application to build upward to best utilize the space.
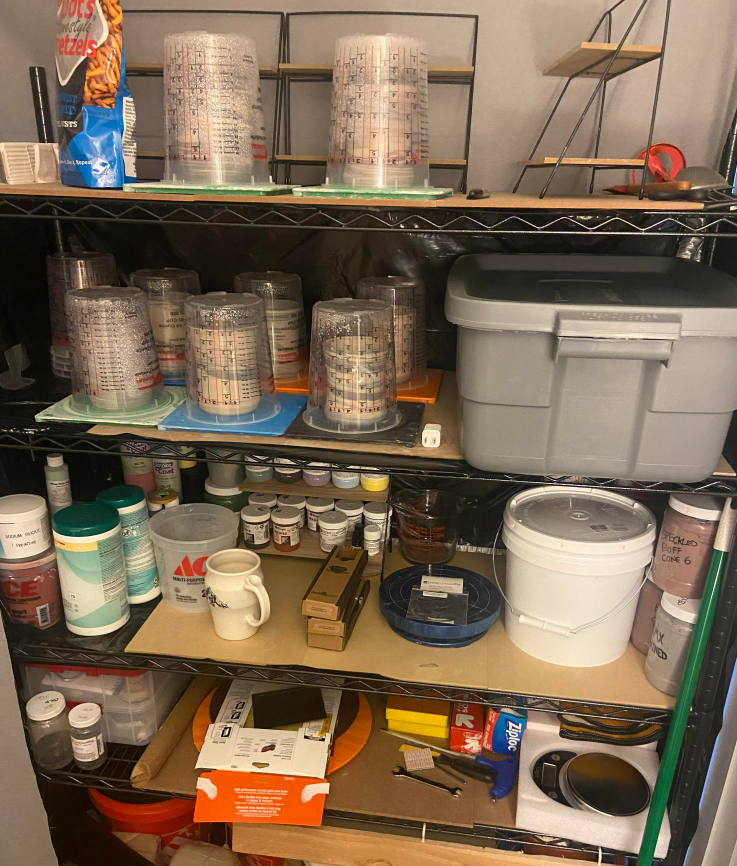
This means floor-sitting 6-8ft wire racks vs wall shelves. Wall-mounted shelves are nice and convenient but inefficient when it comes to space as shelving up and down tends to be underutilized. Too low is a drag to access and vulnerable to kicks, animals, etc. Too high requires a ladder. A drag ain’t it? Many apartment walls are also not reinforced and thus, weaker than say a house with framing studs you can drill into. Wire racks can be not only a very affordable option but very strong and durable for years and quite frankly versatile if you wish to remove it from your art studio and use it for other things. In my case I have two.
Wire racks put the utilization of your space to their maximum from a depth and height perspective. Racks can be found at your local hardware store, or in my case, Home Depot, and vary from 3 to 5 shelves tall, and even cheaper versions can be found used online. Pricing will dictate a lot of your decisions but I opted for a five-shelf rack. I felt 12-15 pieces per month of creation means I need 3-4 shelves dedicated for wet, dry, and storage of pieces before firing with 1-2 shelves leftover for tools, glazes, paints, etc. This is the one step I would not skimp on space. If you are going back and forth between a smaller or larger option for shelving, I certainly have almost never regretted spending a little more to buy a larger rack. Remember, just because your piece is done, doesn’t mean it just disappears! Before firing, it’s going to need a station or home to sit and these racks are perfect to hold these at. On the note of firing…
The non-negotiable firing problem and its solution.

Firing your pottery. Simply put there’s no sacrifice in apartment living to a full firing service provided by a studio, workplace or store unless you own a home with appropriate electrical wiring and the appropriate kiln. I’d love to tell you otherwise, but that’s the reality. Check-in with your local art studios, supply stores, recreation centers, schools, and more as most offer outside firing services on several pricing structures from price-per-piece, per-cubic-inch, and more. Most places have fair firing pricing, however, it’s always good to compare pricing and connect with other fellow local artists on possible shared kiln firings. It’s often “the more, the merry” applies when it comes to spacing in kilns and firing and you can develop many win-win situations through the need for kiln firings. Keep the kilns away from apartments as they simply just aren’t appropriate or safe for the location. They demand too much electricity, a special kind of electrical set-up and are a safety hazard as most apartments are not logically set up for a kiln from the aforementioned electrical situation but also a ventilation situation.
The other major hurdle is your water source. Good news, this one has a solution.
Water is one of the largest major hurdles that keep most artists from pursuing pottery without a full-fledge studio. Pottery sediments cannot be washed down the drain or else it’ll ruin water systems so using the sink in your apartment is a major no-no. Many studios opt for clay traps, something that is often frowned upon installing in an apartment situation and quite frankly, I don’t think clay traps truly catch all the sediments they need to. I’ve removed the dependence of an apartment sink completely and opted for a ‘floating sink’ that runs on a water pump.
My sink is a dual-sink that was picked up for free online. Generally taking up 2’x4′ of your space, the sink’s space is well worth the footprint as a mandatory add for any studio. It is completely separate from any water source in my apartment and is safe in every way.

Now that you have a sink body your next goal is to create the water retainer and its method of transferring the water from the reservoir retainer to the sink spout. For a water retainer, I’ve chosen a typical heavy-duty trash barrel. The size will vary based on how much water you want it to hold, the size of your sink, etc. Internally inside the barrel, I’ve JB welded a plastic splitter with the intention of serious clay chunks falling from the sink on one side of the barrel split by the splitter with the other side of the barrel housing the water pump that will pump the water back up to the sink. This circular flow of water never runs out so long as the water level is above where you mount the pump, which is suction cupped to the side of the barrel. For extra precaution, I have wrapped the barrel with two trash bags just in case of a catastrophic leaking situation.
Ensuring that the splitter is installed with space from the floor of the barrel allows all clay sediments to fall to the bottom of the barrel without potentially being sucked into the pump and also for water to continually pass between the two sides. The pump can also be wrapped with a mesh ‘filter’ preserving its life as clay being sucked into the pump will clog it indefinitely and usually ruin the pump.
The pump is electrically powered and by plugging into the wall, pumps water through the appropriately sized hose up to the spout. I have the hose uncut and used as the actual ‘faucet’ where water comes out for flexibility (almost like a sink nozzle) however, if you choose otherwise the hose can be fitted with fittings to an actual sink faucet.
The sink is the likely piece of the entire pottery studio process that takes the most measuring and handy work but with some patience, engineering, and precision. You can build yourself a well-running sink with less than $100 (mine cost $77.)
I change the water every so often and the sediments at the bottom can be thrown away.
Safety through simplicity.
Home studios have another dynamic that every studio should think about but probably doesn’t. Safety and toxic debris. This is highlighted even more because you live your daily life in this location that you also are now introducing microsized toxins too. Just about every studio I’ve ever visited across the country has a common theme that, while understandable, blows my mind as it’s an extreme safety issue kicking up dried toxic dust daily. Plastic bags.

Covering just about every board, then wrapping just about every piece that you’ve ever made. The plastic retains the wet clay slip on it before the clay dries out. Any movement of the plastic shakes this dried slip off in the form of dust and kicks it into the air for toxic breathing. Any potter who has not read about ‘Silicosis’ should absolutely read up on this long-term issue that many artists could find themselves dealing with without proper precautions taken to avoid exposure over several years. While I’m a big believer that life is short and should be enjoyed doing what you love, what we love in many ways is toxic and any precautions we can take to avoid this exposure should be done.
To get around using plastic bags on pieces and introducing a major ‘dust creator’ as I like to call them, I use hard-plastic Tupperware material buckets flipped upside-down to cover the piece on the bats post-throw. This covering doesn’t require weight down on it and can easily preserve the moisture of a piece to leather-hard for weeks without batting an eye simply just encasing the piece in its own atmosphere inside the bucket.
This is truly a major game-changer with the only con being you need a container size for any piece size you may make. Mug creators like myself will find convenience in the 5-quart Ace Hardware paint buckets as they flip over and have nearly 6” of internal height space to encase the piece you make, however, I did purchase a larger lidded Tupperware container that holds the larger or oblong shaped pieces that I wish to introduce drying to slowly before the bisque fire.
Another thing I’ve done to add to safety is buying a fairly well-rated air purifier. While I don’t know if this air purifier truly does work, it certainly is a nice piece-of-mind addition that can’t hurt, right? Leaving mine in the idle position, it speeds up and slows down based on the toxins it picks up and rates the air quality by number with anything under 20 considered low (very good air) and anything over say 50 is bad. In a few months of usage, it’s never left the 20 mark through my general usage of the studio and thus, leads me to believe I’ve done a great job at cutting dust down. As an experiment, I created a lot of smoke when I first bought the purifier by sizzling some steak on the oventop. This smoke immediately kicked the purifier on into high gear as it read 200+ on the ‘air quality.’
I have also crafted a lot of general techniques in my creative process that are very ‘dust friendly‘ as I rarely trim (a typical dust creator) and any sanding is obviously done outside. I’ve gone a step further by removing clay I buy immediately from its bag and placing the clay inside 5-gallon buckets. Again, the goal is to eliminate the potential for air-born dust and anything you can do to do this like keeping your wheel clean should be a high priority. And speaking of your wheel…
The crown jewel and tips to keep it alive.
The pottery wheel is usually the crown jewel for any artist and their studio. I’ve opted for the Shimpo VL Whisper wheel as it is one of my favorites next to the Brent’s and priced a little better. The silence of the wheel is nice for recording videos at home and eventually what I’d like to do in streaming my wheel sessions.

One tip I recommend all folks to consider is to unplug your wheel after usage. The wheel remaining plugged in leaves it vulnerable to surges, which are more common in apartment living and can damage your wheel’s internal electrical system. Buying a surge protector can also help but nothing would substitute just simply unplugging it when it’s not in use. You spend a significant amount of money on the wheel so protecting it should be a major priority. Other things like keeping the wheel head clean cuts down on dust and if the wheel is not utilized often, leaving a clean wheel head vs leaving say a bat on it can keep potential rust/markings from forming and killing the lifespan of your wheel head.
More than anything in a pottery studio with throwing sessions, every movement should be efficient and effective. If this space is yours, make it yours. Build shelving or hanging electrical ports in certain areas where you usually keep tools, phone chargers, bats, etc to ease your throwing sessions only makes you that much more efficient. No movement should be wasted in a small space. The easier a throwing session is by virtue of comfort, the more your mind will be free, and the better results you will see in your creations.
For those setting up a new studio, whether in a professional space or personal apartment space, I recommend not falling in love with your set up until after a few months of usage. You may rack your brain for days trying to figure out which configuration is the best only to find that once you start creating pieces, you’d rather see this table here or that wheel there. Allow your creation to begin and by nature, the configuration will begin to find itself into it’s appropriate home.
While I do use rags during my throwing sessions, I try to keep them to a very minimum and they are disposable ones purchased with the idea of being thrown away as soon as I’m finished. Rags, like plastic, retain dust and can easily put these particles airborne simply by running your hands through the rag. I’m very adamant about keeping rags only for throwing sessions while the clay is wet and disposed of before drying.
All these efforts are put forth to ensure the most healthy and efficient studio possible, while dealing with the challenges of a small space and limited resources. But make no mistake, done correctly, these studios built for you can get you especially motivated to get into the studio to work as your excitement increases to create more art.
Any questions you have I am welcome to answer via email and I hope this article helps or motivates you to better your studio at home or apartment in the future!